Animation templates
You can create own animations using the Animation Template Editor of the FirstView Manager. Using the Animation Template Editor an animation template is created. The locations of elements and their settings are defined to the template. To use the Animation Template Editor the computer must have the Adobe Flash Player installed. If you don’t have it, you can download it here: https://get.adobe.com/flashplayer/
Creating animation templates
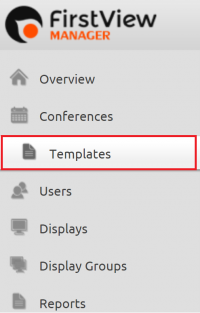
Choose the Templates tab from the left side of the FirstView Manager.
Click the plus sign from the right side of the ”Animation templates” section to create a new animation template.
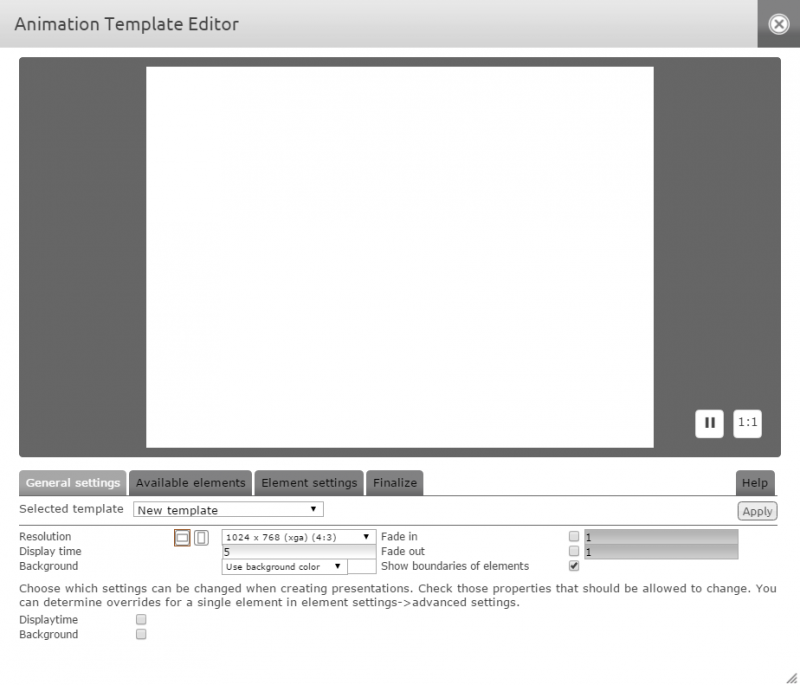
The animation template is created in four phases which include General settings, Available elements, Element settings and Finalize respectively.
General settings
First, the size of the template and the screen orientation are defined (landscape/portrait). The size of the template e.g. resolution is chosen according to the display’s aspect ratio.
For instance, for a 16:9 landscape display the resolution 1920 x 1080 is chosen. Select the display time according to how long you want the presentation to show on screen at a time.
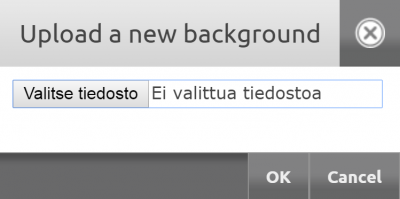
For the background, a background color or a background imported from the computer’s hard drive is chosen (upload a new background --> "Valitse tiedosto"). The background can also be chosen from other templates (the editor lists existing backgrounds automatically).
After choosing the background the user defines which settings can be modified when adding the presentation to a display. The creator of the animation template can decide if it is allowed to change the background or display time when adding the presentation to a display. If the settings are not wanted to be left open, don’t tick the ”Display time” and ”Background” boxes.
The animation can also be set to fade in/out from the General settings. The fadings can be added by choosing ”fade in” and/or ”fade out” from the settings. A duration can also be set for them.
The outcome of the fading can be previewed by clicking the ”Apply” button, which also saves the settings. Then press the Play button in the screen area. In addition to the fading you can choose whether the boundaries of the elements are shown in the presentation (add elements to the presentation first to notice the difference).
Before you leave the General settings, save all changes by clicking ”Apply”. (You can see the changes in the screen area every time you click Apply).
After defining the General settings, move on to Available elements.
Available elements
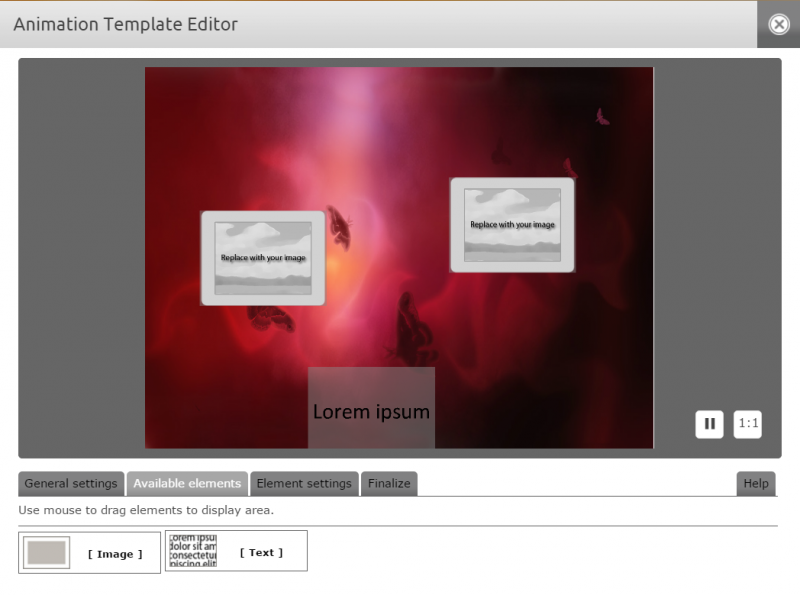
The image element is a field to which an image can be added. Likewise the text element is a field to which text can be added. You can drag as many text and/or image elements as you want to the screen area of the template.
All added elements can be seen on the screen area. You can pre-position the elements to locations of your choice by dragging them and you can modify their size from their right and lower outline.
After adding elements, move on to ”Element settings”.
Element settings
Select the element to be modified by activating it from the screen area or by choosing it from the ”Settings” dropdown list.
Every element has four different settings: Basic settings, Effects, Transitions and Advanced settings. The modifying is started from the Basic settings, which is first in the list by default. At this point the final position and size of the element is defined. You can modify the element by dragging/stretching it or defining the settings straight to the editor (x, y + width/height).
The name of the element can be modified in the ”Field name” section and the alignment can be chosen from the ”Alignment” section.
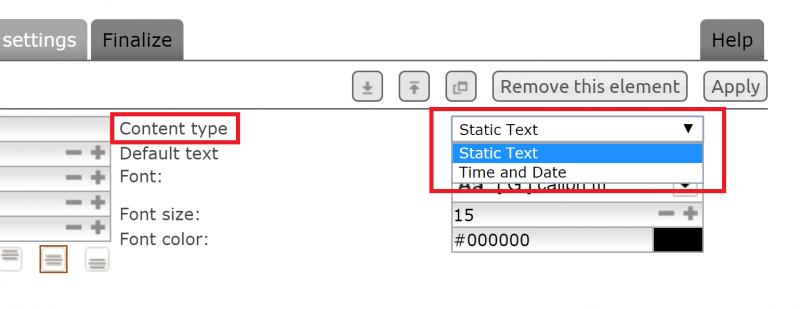
A content type for a text element can be chosen from the ”Content type” section. “Static text” means that text can be added to the field. “Time and date” means that only a time and/or a date can be added to the field. The time content to be shown is chosen from the “Date format” menu. The time and date are updated automatically depending on the media player’s time zone. After this a font, font size and color is chosen for the text elements.
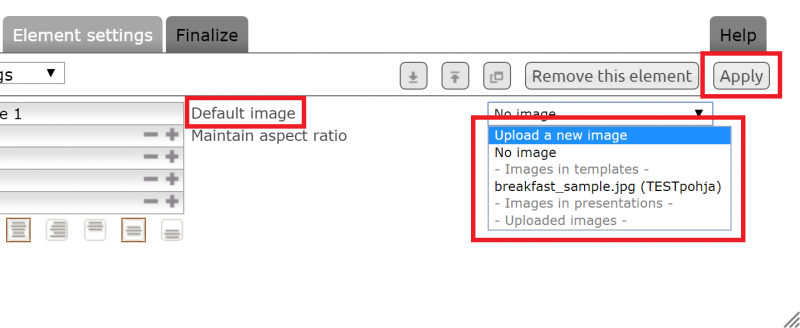
In an image element advanced settings include maintaining the aspect ratio and uploading a possible default image.
When selecting a default image choose ”upload a new image” from the ”default image” dropdown list. Select the image from your computer and click “ok”. After this click “Apply” for the selected image to appear.
After Basic settings, move on to Effects.
Effects
You can create impressive glow and shadow effects for the elements.
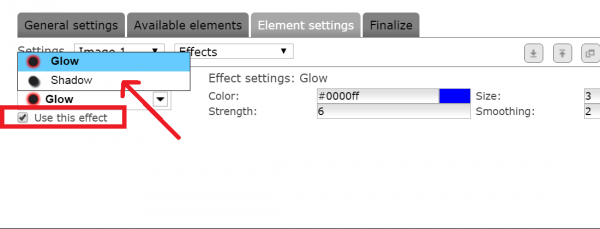
Both text and image elements have the same effect options. Either ”Glow” or ”Shadow” effects can be chosen from the ”Available effects” menu. The option ”Use this effect” is selected below the dropdown list to apply the effects (by removing the selection you can deactivate effects for that element).
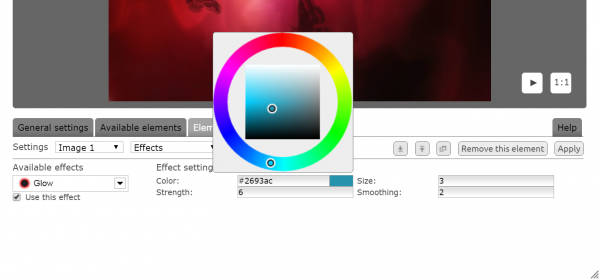
After selecting the effects, a color, size, strength and smoothing are chosen for them. For shadow effects the following additional settings are available: distance and angle of the shadow.
When done with the effect settings, save changes by clicking ”Apply”. You can now see the changes in the screen area. You can modify and save changes until you are satisfied with the result.
You can use only one of the effects, or you can use both. Choose effects by ticking ”use this effect”.
You can preview the whole template by clicking the play button in the screen area.
Transitions
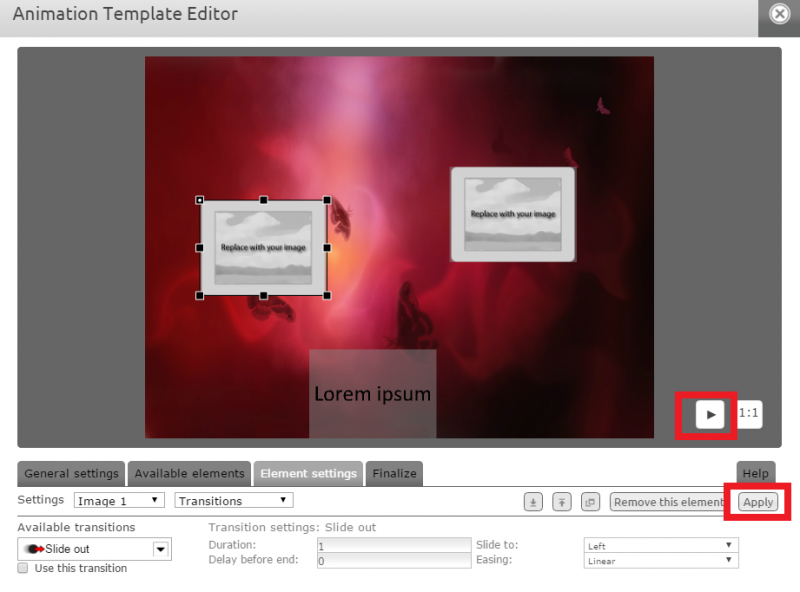
After choosing the effects, move on to "Transitions". Choose the transition effect of your choice from the ”Available transitions” menu.
Remember to tick the ”use this transition” box. Only then you can modify the transition effect.
In fade in/out transitions the duration and delay can be defined. In slide in/our transitions additional options are ”slide to” (left/right/top/bottom) and ”easing” (linear/start fast/end fast/bounce back).
You can choose any amount of transitions for a element. You can use one, or you can use all of them. Activate a transition by ticking the ”use this transition” box.
When done with the transitions, save changes by clicking ”Apply”. You can now see the changes in the screen area. You can modify and save changes until you are satisfied with the result.
Advanced settings
Finally, the advanced settings are adjusted. From the advanced settings you can define which settings users can modify when the presentation is being added to a display.
Choose the options that you want to be modifiable and save changes by clicking ”Apply”.
When the General, Effect, Transition and Additional settings for all elements of the template are done, it is time to finish the animation template.
Finalize
A descriptive name is given to the animation template (for instance, ButterflyBackground_WhiteText). Then usage rights (i.e. how widely the layout is distributed) are defined. Zone admins can add the template for the whole organization to use, conference users only for their own unit. When you’re satisfied with the outcome, click Save.
