Splitting the display into zones
A digital display can be split into three different zones using the FirstView Manager. Several different materials can be presented at the same time by splitting the display into zones.
The user can define the size and position of the zones himself/herself.
Sisällysluettelo
Splitting the display into zones:
Display zones can be created in the Display Group management. An existing display group can be chosen from the dropdown list or a new one can be created by clicking the plus sign. An existing display group can be modified by clicking the pencil icon.
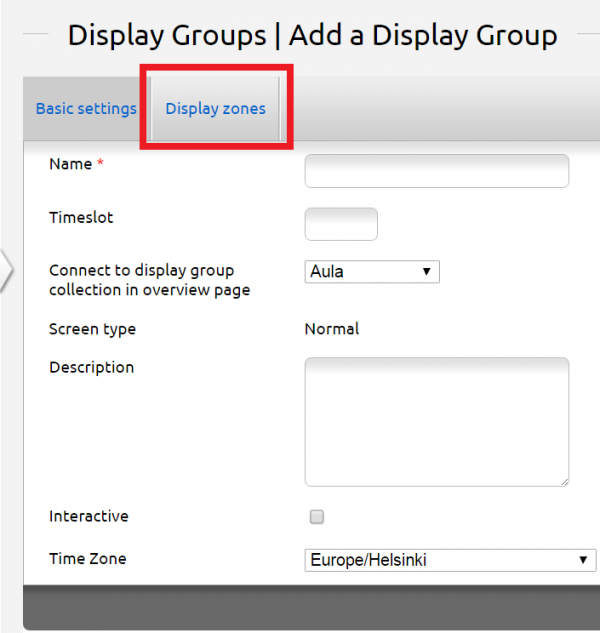
There are two settings tabs in the Display Group management: ”Basic settings” and ”Display Zones”.
Choose the ”Display Zones” tab to split the display into zones.
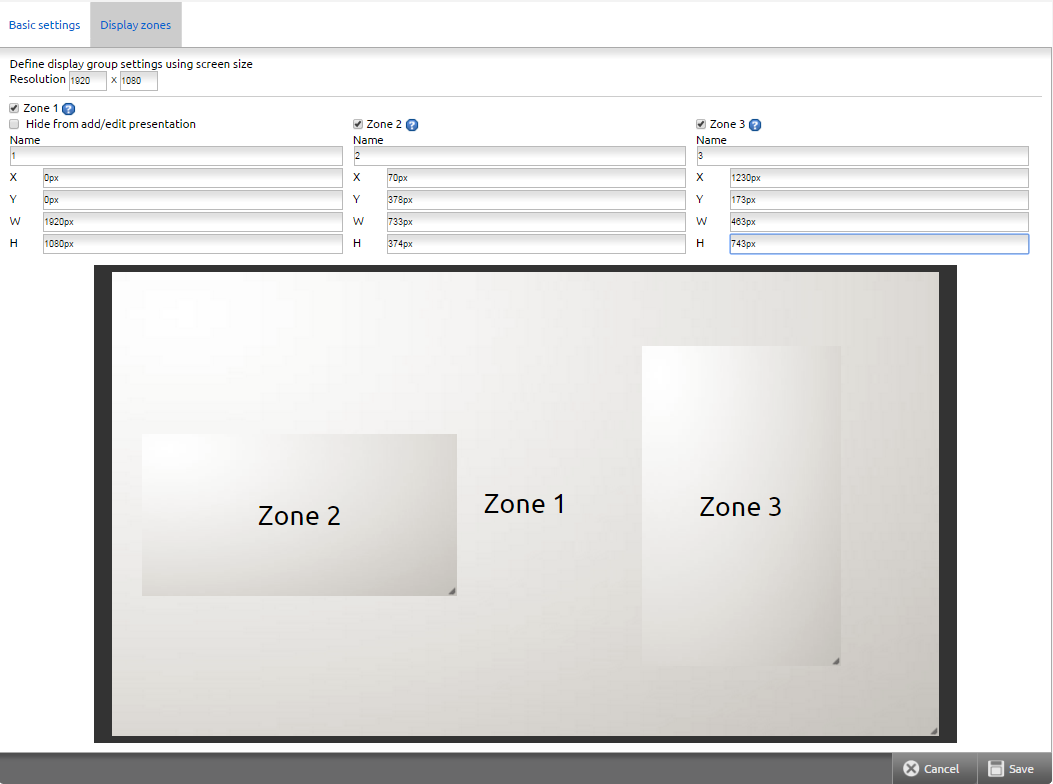
First you have to define the resolution of the display. The default resolution is 1920 x 1080, but you have to change it according to the display’s resolution.
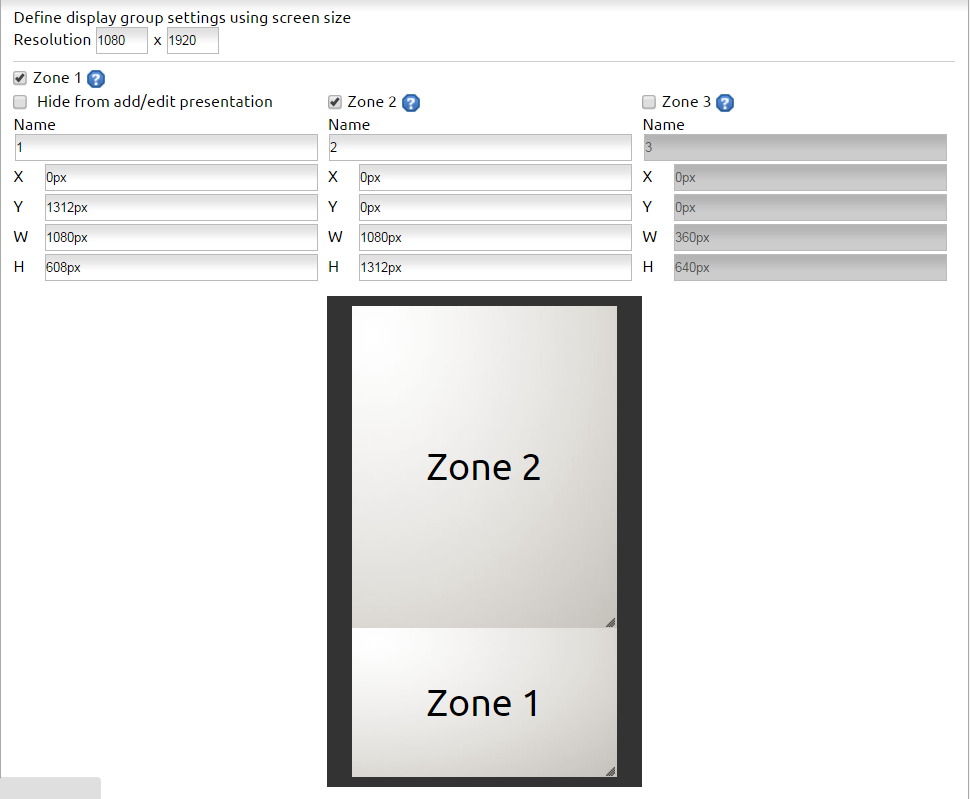
Please note that in a vertical display (portrait) the width and height change places and the aspect ratio changes (1080 x 1920).
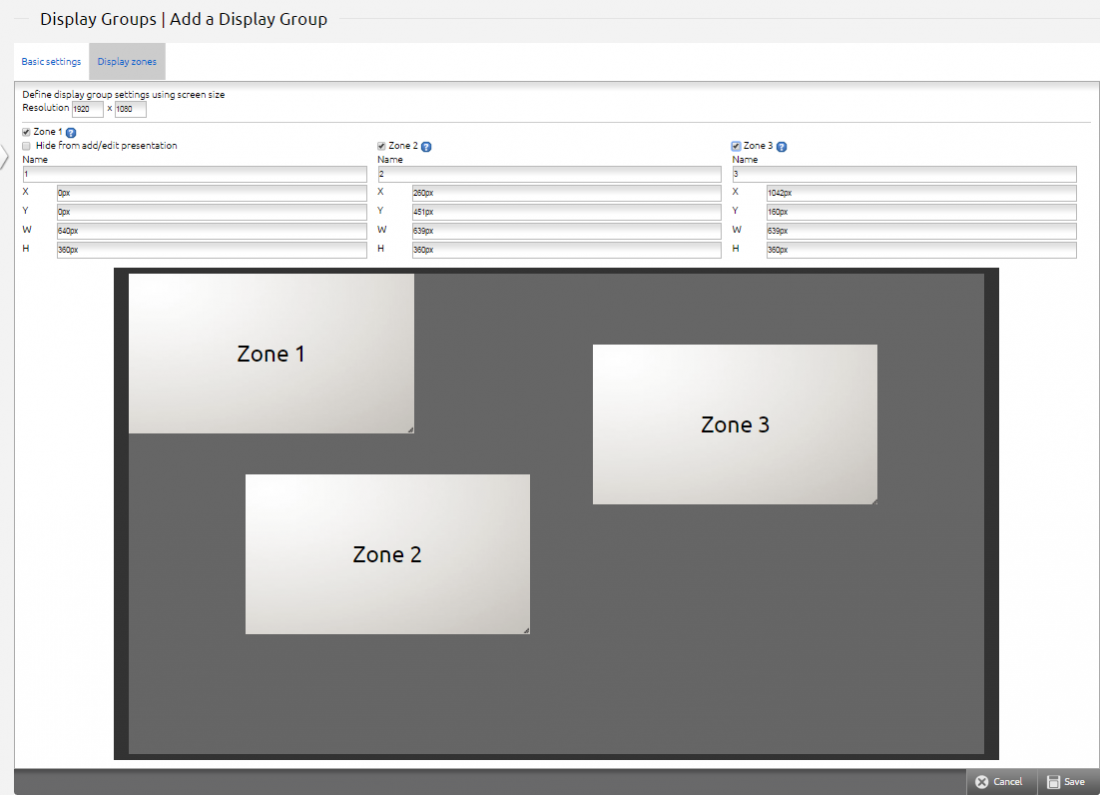
After defining the resolution the user chooses how many zones are to be activated by ticking the desired zone(s). If all three zones are activated the screen will be split into three zones. All zones don’t have to activated, as the screen can also be split into two zones. After activating a zone it is recommended to name it to make adding material easier.
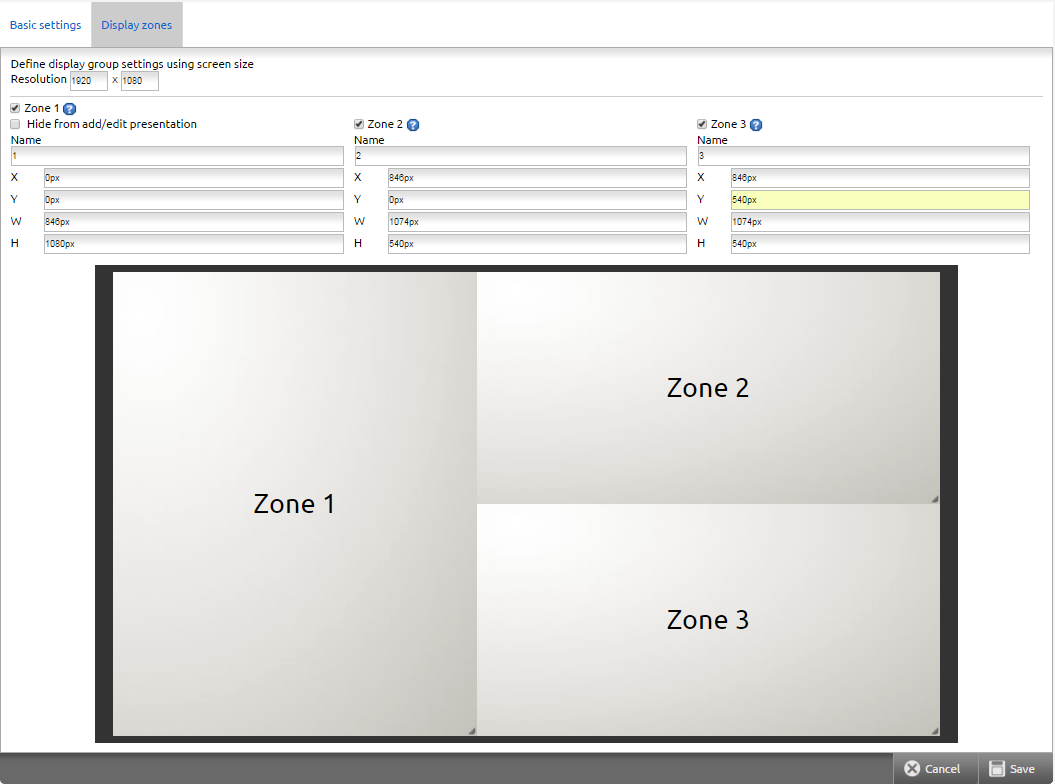
After adding the zones their size and positions on screen are defined. The zones can be dragged/stretched in the screen area or the information can be filled directly beneath the zone’s name (location x/y, size W/H).
X and Y depict the zone’s location on the display.
- X = display’s width (0 px – 1920 px in the example picture)
- Y = display’s heigth (0 px – 1080 px in the example picture)
Using X and Y the direct location of the zone’s upper left corner can be defined.
W (width) and H (height) depict the size of the zone.
- W = zone’s width
- H= zone’s heigth
The most imporant thing to remember when creating zones is to not exceed the display’s maximum resolution (for example 1920 x 1080). In the example picture the combined width of Zone 1 and Zone 3 is 846 px + 1074 px = 1920 px (which is the width of the display) and the combined height of Zone 2 and Zone 3 is 540 px + 540 px = 1080 px (which is the height of the display)
If the zones are created manually by dragging/stretching them, it is recommended to check their combined width/height to ensure that the display’s maximum resolution isn’t exceeded (the zones are on each other on the screen) or deceeded (empty space between zones).
What should be taken into account when creating zones
The zones should be planned according to what kind of material the user wants to present. The material is recommended to be of same ”size” as the zone – otherwise the material will stretch/shrink on the display.
In the example zoning below the vertical display’s lower part (Zone 1) is a horizontal zone with an aspect ratio of 16:9 to enable normal horizontal material to be presented (for ex. 1920 x 1080). In this case the resolution of Zone 2 is 1080 x 1312 (aspect ratio 135:164). The material in Zone 2 has to be in this resolution, or the material will be distorted on the display.
NOTE: Videos can only be played in Zone 1 when using the PiCube media player. The HD Cube doesn’t have any restrictions.
Zoning in layers
Zones can also be created in layers. For example, Zone 1 can be the ”background” for Zone 2 and Zone 3. In this way one zone can play video in the background and another zone can add text on the video at the same time. When creating the zones in layers the relations between zones function as follows:
- Zone 3: overruns Zone 1 and Zone 2Ajaa Alue 1:n ja Alue 2:n yli
- Zone 2: overruns Zone 1
- Zone 1: functions as a background.
NOTE!
The layering functions a little bit differently when using the PiCube media player (because of its restriction to play videos only in Zone 1). If the user wants to play video when using the PiCube media player, it will only play in Zone 1 and will overrun other zones when layered. In this case Zone 2 has to be the ”background”, Zone 1 plays the video and Zone 3 will play all other material. If zone layering is done using the PiCube media player and doesn’t include videos, layering functions normally.
Adding material to display zones
If the display zones were created to an existing display group that already had material, all materials will transfer automatically to Zone 1.
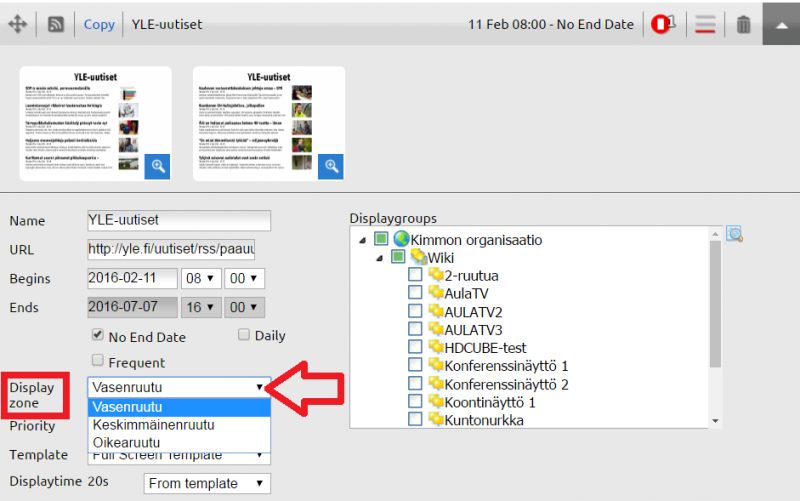
When modifying existing material or when creating a new presentation, the presentation settings will now include the ”Display zone” section (when zones have been activated).
Using the ”Display zone” dropdown menu you can choose or change the zone where the material will be shown.
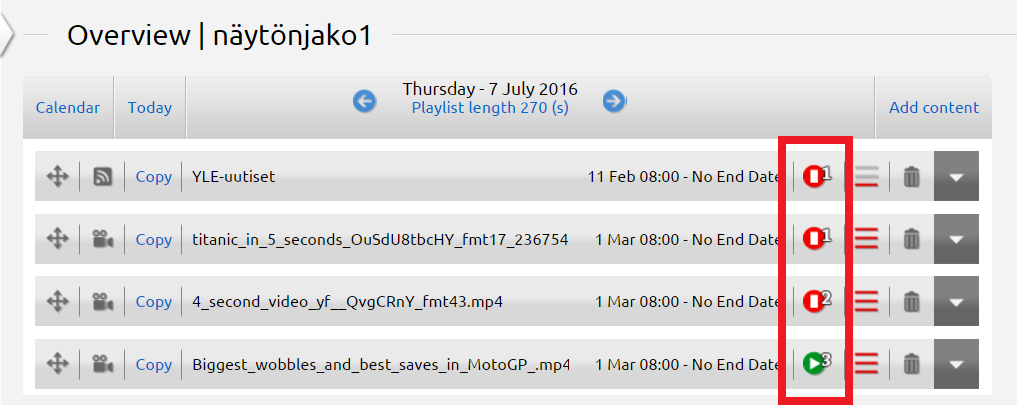
You can see all presentations and which zone they are shown in from the display group’s media list. The number of the zone will show up next to the play/pause button of the material.

