Text templates
A template consists of two elements: the background and the layout. The layout defines the appearance of the presentation starting from fonts to the locations of elements. The layout is “pasted” on the background, forming a template. The user has the right to the change the background of all template types, but only the text and animation templates’ layout can be modified. The creation and modifying of all templates is done from the “Templates” tab of the FirstView Manager.
Creating a text template
When creating a new template it is recommended to start by choosing a suitable background. The background plays a big part in the appearance of the text template, so it can have a background color or the company’s logo in it. However, the most important fact in choosing a background is that it corresponds to the display’s aspect ratio (e.g. 16:9) and is of good quality (e.g. Full HD).
The actual text template is created as follows:
1.Log into FirstView-Manager (https://login.firstviewds.com)
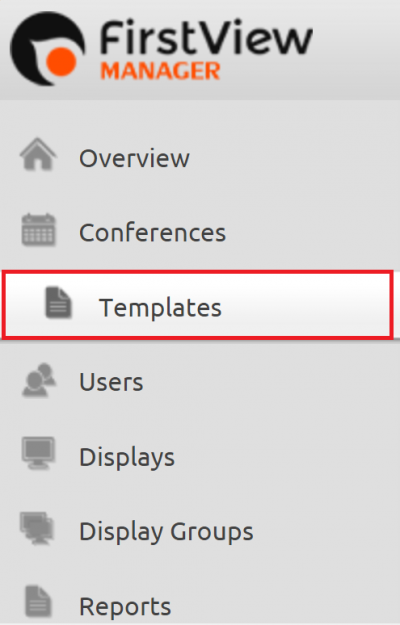
2. Choose the ”Templates” tab from the left side of the page.
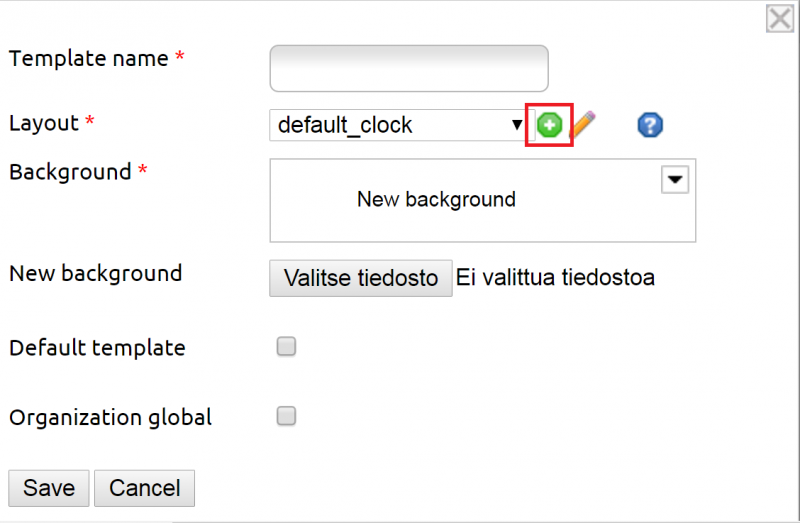
3. A text template can be created by clicking the plus sign from the right side of the “Text Editor Template” section. A new window will open.
Creating a text template is started by choosing an existing layout or creating a new one (the amount of text, location of text and fonts are defined)
Creating a layout
A new layout is created by clicking the green plus sign from the ”Layout” section. A new editor tool will open.
With the editor tool a layout that is ”pasted” on the background is created. The layout defines the appearance of the template.
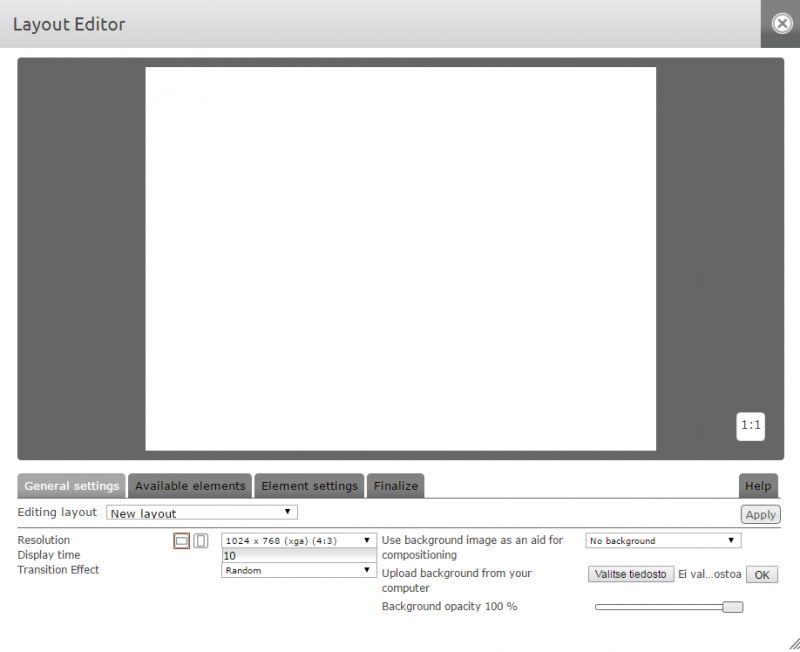
The layout editor consists of 4 tabs: General settings, Available elements, Element settings and Finalize. The settings of the text template are defined in order from left to right according to the tabs.
General settings:
First, the size of the template and the screen orientation are defined (landscape/portrait). The size of the template e.g. resolution is chosen according to the display’s aspect ratio. For instance, for a 16:9 landscape display the resolution 1920 x 1080 is chosen.
Define the default display time, for example 10 seconds. The display time can also be modified later when adding the presentation to a display.
If you want to use a background image as an aid for compositioning, you can import a background by choosing a file (”Valitse tiedosto”). You can also select a background from an existing template by accessing the dropdown list above. When importing a new background image be sure to click ”OK”. The opacity of the background can also be modified.
When creating a template to a HD Cube media player, you can select a transition effect to the layout (transition effects don’t work in the PiCube media player).
When the settings are done, save changes by clicking ”Apply” and click “OK” when the confirmation window opens.
The general settings are now finished. Next up are Available elements.
Available elements
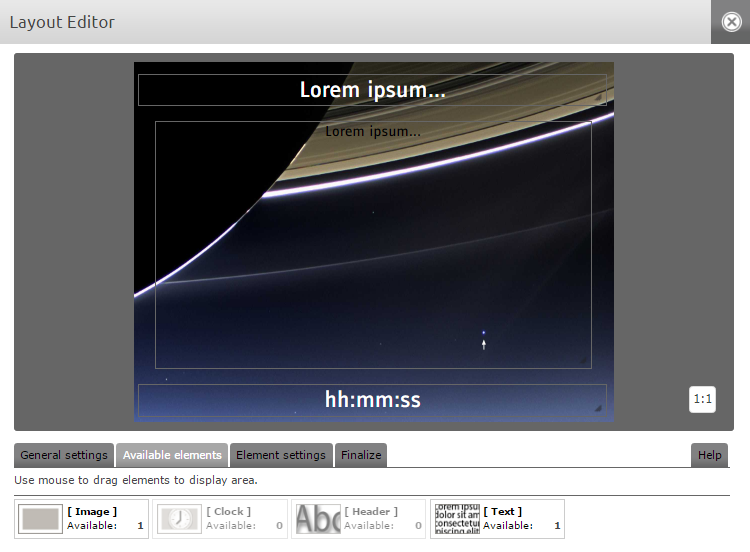
Elements that can be added to the layout include Image, Clock, Header and Text elements. The element box (Available) shows how many items of one element can be added to the layout.
The header element is mandatory, others are optional. The elements are brought to the layout by dragging them to the screen area. The Clock element can only be used with the HD Cube media player.
A header, clock and text element have been added to this example image. The location and size of the elements can be changed by dragging them from the lower right corner of their active area.
After choosing and placing the elements to the layout, the Element settings will be defined.
Element settings
By clicking an element you can define its settings.
Start by choosing the final size and position of the element either by dragging or stretching the element, or define the settings straight to the editor (position x, y + width/height).
In addition to the basic font settings, also the text content can be defined in the Header and Text element settings. This means that when adding a text presentation to a display there are instructions in the header and body fields to filling the text section, for example (text 1: internal briefings, text 2: upcoming events). Finally an alignment is chosen for the elements.
NOTE! When you move on to the next element, remember to save changes by clicking ”Apply”. You can preview the layout by clicking “Preview”.
Lastly, the layout is finalized.
Finalize
When finalizing, the layout is named first (for ex. 'white_header_text_and_picture'). Then usage rights (i.e. how widely the layout is distributed) are defined. Zone admins can add the template for the whole organization to use, conference users only for their own unit.
When you’re satisfied with the outcome, click Save and wait until a confirmation message shows up.
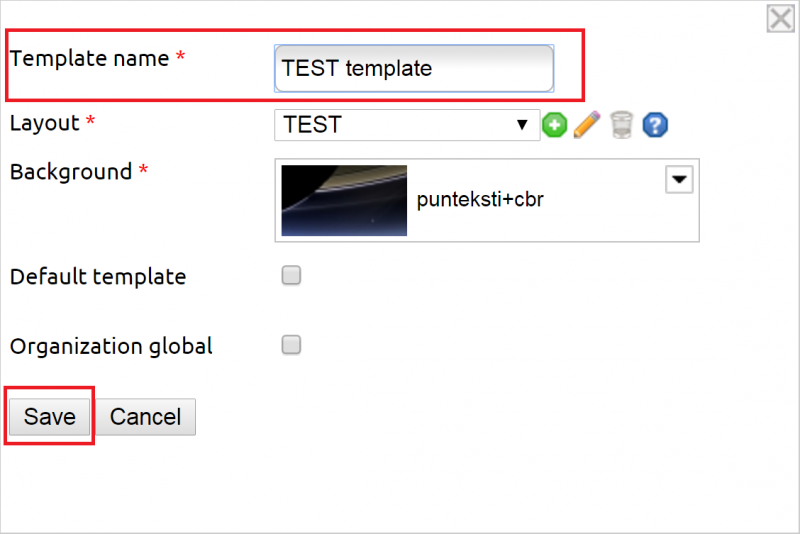
After saving, close the layout editor from the upper right corner. Now the layout is finished and it can be found from the Layout dropdown list. Next, give the template a descriptive nickname (for example ”PictureTemplate_landscape” or ”TextTemplate_Portrait).
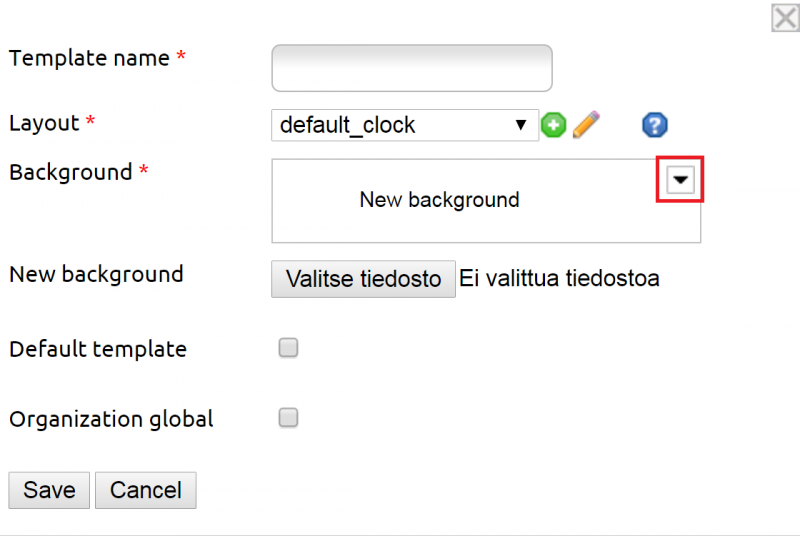
After creating or choosing a layout a background is added to template (unless it has already been added when creating the layout). Then you can choose whether you want the template to be the default template and/or if it is to be distributed to the whole organization. Then save the template.
Using templates / Adding text presentations to displays
Templates are taken into use when adding a presentation. If you are not familiar with adding presentations to displays, check this link.
Adding a text presentation is started from the Overview page.
Select a display group, click Add content and choose ”add text” from the dropdown list.
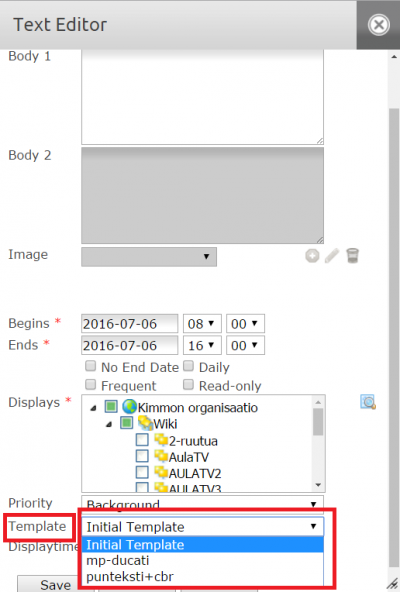
Choose the text template that you have created from the ”Template” dropdown list and click ”OK” when you see a pop-up message. After choosing a template you can move on to modifying the basic settings of the presentation, such as adding text and scheduling. You can preview your presentation by clicking “Preview”.
When you’re satisfied click ”Save” and the presentation will transfer to the display(s).
Changing the background of an existing template
Templates can be modified by accessing the ”Templates” tab.
If you want to change the background of a text template, choose the template from the ”Text Editor Template” dropdown list and click the pencil icon on the right.
A new background is set by clicking the small grey down arrow from the right side of the ”Background” section..
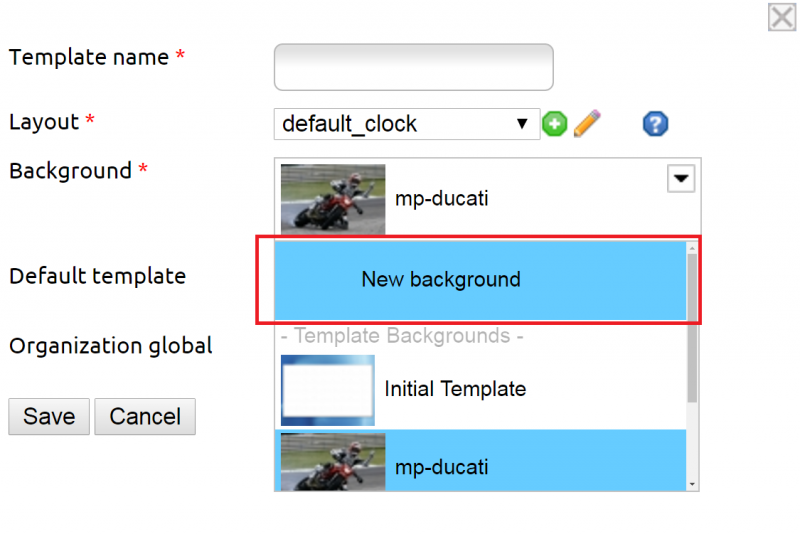
Choose ”New background” and search your hard drive for a background (the recommended file formats for pictures are .JPG and .PNG). After choosing a background click “Save”.

