Ero sivun ”Kokousten lisäys/en” versioiden välillä
(Ak: Uusi sivu: The information concerning the event in progress and the following event happening in the same conference room will be shown in turns.) |
(Ak: Uusi sivu: 600px You can preview the conference display by clicking Overview.) |
||
| Rivi 68: | Rivi 68: | ||
[[Tiedosto:Kokousten lisäys-9.png|right|600px]] | [[Tiedosto:Kokousten lisäys-9.png|right|600px]] | ||
| − | + | You can preview the conference display by clicking Overview. | |
Versio 6. heinäkuuta 2016 kello 08.25
In addition to marketing and informing the FirstView Manager can be used as a reservation system for your conference rooms by using the conference and guiding tools.
The conference reservations can be accessed from the left part of the FirstView Manager by clicking the Conferences tab.
From the Conferences tab you can see the daily view of the conference premises (for ex. conference rooms 1, 2 and 3). You can move between days by using the arrow buttons in the upper-left bar or the calendar button in the upper-left corner (see the picture).
The conference list button shows an overview of all conference reservations. You can easily modify the reservation of your choice by accessing the conference list (see the picture).
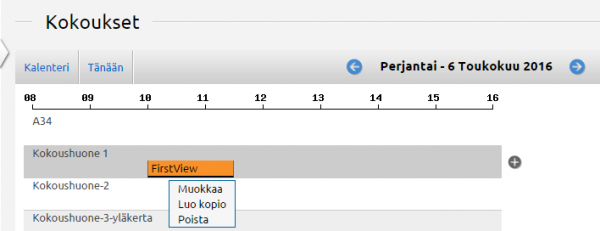
In the Conferences tab every conference room can be seen in its own row beneath the line depicting the time of the day. The name of the person who has reserved the conference room can be seen on the horizontal bar depicting the reservation.
A new reservation for a conference room can be added by moving the cursor on the desired room and clicking the green plus sign that pops up on the right side of the row. When the plus sign is clicked a new window will open. There you can add a new reservation.
Adding a conference:
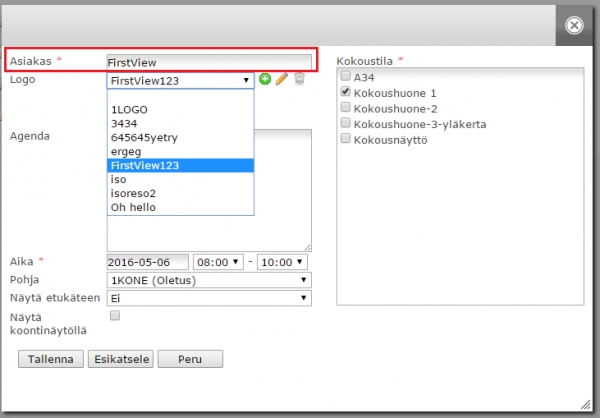
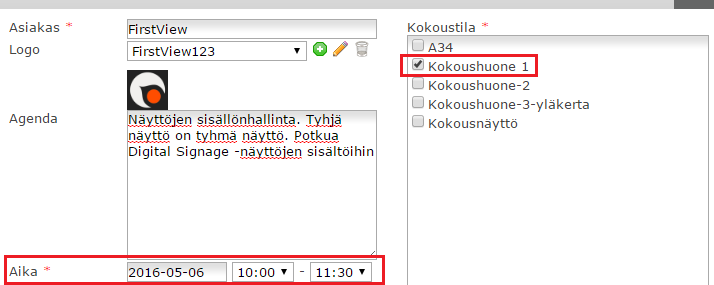
The name of the client is typed to the ”Client” section.
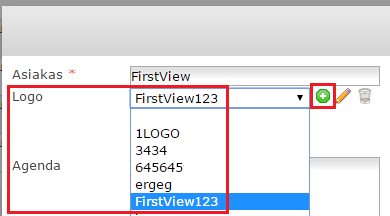
After naming the client a logo can be added. If the client already has a logo added to the system, it can be found from the Logo dropdown list.
If a new client is in question, the green plus sign on the right side of the Logo text has to be clicked.
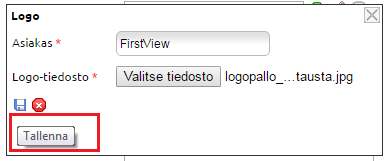
A new window will open. There you can search the computer’s hard drive for a logo picture. Name the client, choose the file and click Save.
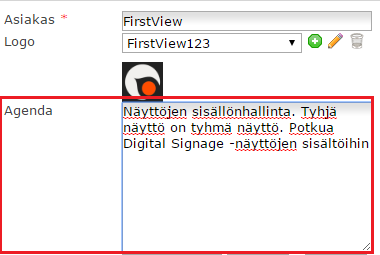
The conference’s agenda can be written to the Agenda section if you want it to show on the conference display (for example time table, topic, guest names etc.)
A date, starting time and ending time will be set to the conferences.
Be sure to also choose in which conference room(s) the conference will be held.
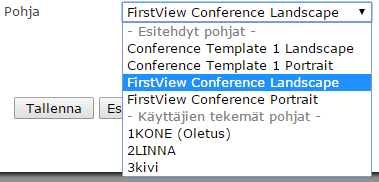
Choose a template for the possible conference displays.
You can order more templates from FirstView’s technical support according to the existing pricing.
From the dropdown list, choose how long the information regarding the conference will be shown on conference displays before the beginning of the conference.
The information concerning the event in progress and the following event happening in the same conference room will be shown in turns.
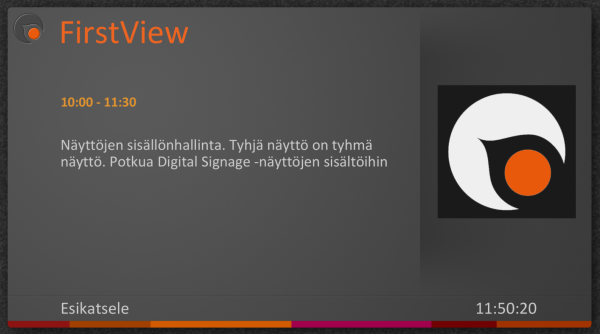
You can preview the conference display by clicking Overview.
Esitys lähetetään näytöille tallenna-painikkeella. Tallennus voi kestää hetken kokoustilojen ja kokousten määrästä riippuen. Jos haluat, että kokous näkyy koontinäytöllä (esimerkiksi aulanäytöllä), niin valitse ”näytä koontinäytöllä”.
Kokouksen lisäyksen jälkeen, kokous ilmestyy näkyviin oman kokoustilansa vaakariville kokouksen kestoa esittävänä palkkina. Kokouksen tietoja voidaan muuttaa, kopioida toiseen ajanhetkeen ja poistaa klikkaamalla kokouksen aikajanaa ja valitsemalla haluttu toiminto avautuvasta pikkuikkunasta.
Näkymän oikeassa yläreunassa olevan "Esikatsele" –painikkeen avulla on mahdollista nähdä nykyhetken koontitaulun (aulanäyttö) esikatselukuva. "Esikatselun" valinnan jälkeen avautuvasta "Koontitaulun esikatselu" -ikkunasta valitaan koontitaulu, josta halutaan nähdä esikatselu. Esikatselukuva avautuu uuteen selainikkunaan.
FirstView-järjestelmä luo koontitaulun esityksen automaattisesti (tehtyjen varausten perusteella). Järjestelmä päivittää seuraavan päivän koontitaulun tiedot aina edeltävän yön aikana. Kokousvarauksen päätyttyä varaus poistuu ovenpielinäytöiltä ja koontitaululta automaattisesti. Huom! Varausten häviämiseen koontitaululta saattaa mennä 15 minuuttia.
"Yhteenveto"-sivun kautta voidaan ovenpieli- ja koontinäytöille laittaa myös muutakin materiaalia kuin kokoustoimintoja. Kokousvaraukset tulevat järjestelmästä automaattisesti prioriteetille "normaali", joten jos muun materiaalin toivotaan näkyvän vain silloin, kun kokousvarauksia ei ole, tulee lisätyn materiaalin prioriteetin olla "tausta". Jos näytöllä halutaan esittää vuorotellen kokousvarauksia ja vuorotellen muuta materiaalia, tulee muun materiaalin prioriteetin olla "normaali". Korkea prioriteetti ajaa kokoustoimintojen yli.
Kokousvarauksia ei ole mahdollista muokata "Yhteenvedon" kautta, vaan muutokset tulee tehdä aina "Kokoukset" -välilehdeltä.


