Special settings of presentation types
Various materials can be added to the media list using the FirstView Manager. In addition to their basic settings every presentation type has their own characteristic settings. If adding content using the FirstView Manager isn’t familiar to you, check this link for more information: Adding content to displays
Sisällysluettelo
Text presentations
In a text presentation, a header, text and possibly a picture are added to a pre-made text template. The template defines the layout of the presentation (font, location of elements etc.)
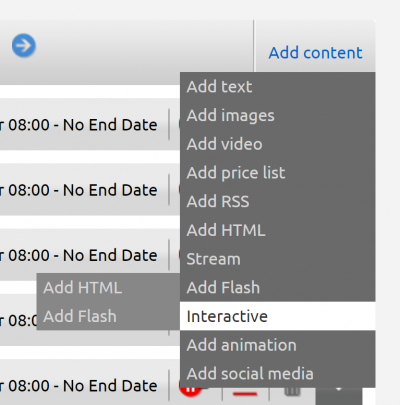
This means that only the desired text is added to the template, which has already been made to match the company’s appearance, for instance. You can add a text presentation after selecting the desired display group and choosing “Add content --> add text”.
The first thing that should be done when adding a text presentation is to select a template. After that the basic settings are made (name, start and end time, displays and priority).
The template defines what kind of material can be added to the presentation.
The desired template is chosen from the dropdown list ”Template”. For information on creating presentation templates, check Text templates
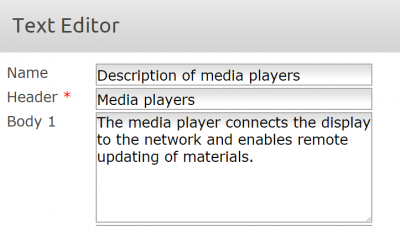
First, a name is given to the text presentation. Then the body text is added.
The amount of body texts depends on the template being used.
If a picture can be added to the chosen template, it is added to the Manager by clicking the green plus sign.
A name is given to the picture. After that it has to be searched from the computer’s hard drive and saved to the Manager by clicking the diskette icon.
After possibly adding a picture a display time is chosen for the text presentation.
The template has a default display time, but it can be changed by choosing ”custom”.
The final result can be checked by clicking ”Preview”. When the presentation is ready, click save.
Pictures
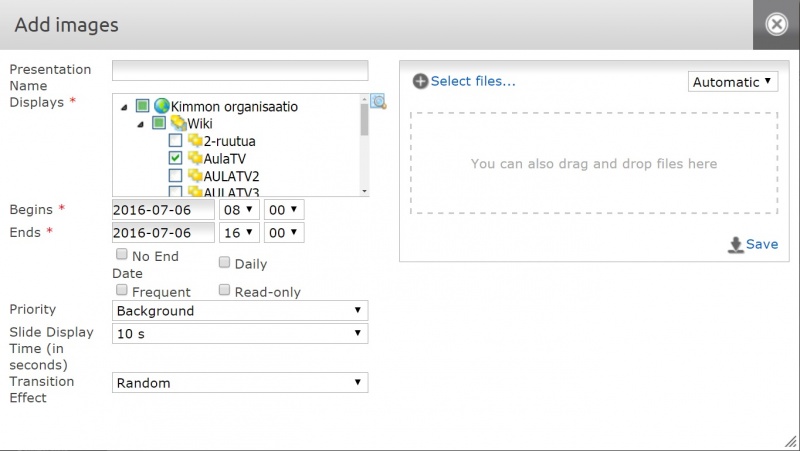
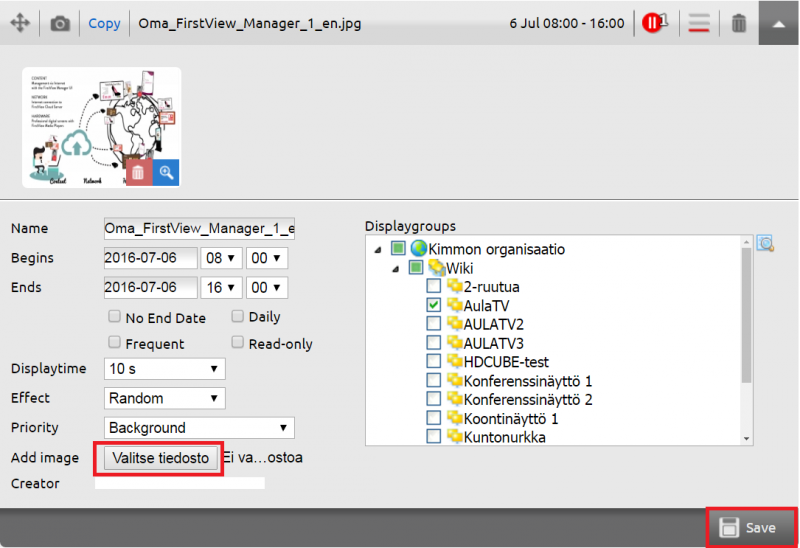
A single picture or a series of pictures can be added to a picture presentation. Click “Add content” --> “Add images” after choosing a display group from the Overview tab.
When adding a picture presentation the general settings are defined first (naming the presentation, begin and end time, displays and priorities)
When adding a picture presentation the additional options ”slide display time” and ”transition effect” can be found.
The ”slide display time” means the duration a single picture is shown and the ”transition effect” means the effect that occurs when pictures are switched.
Thanks to the switching effects pictures are switched smoothly. Please note that the switching effects only work with HD Cube media players.
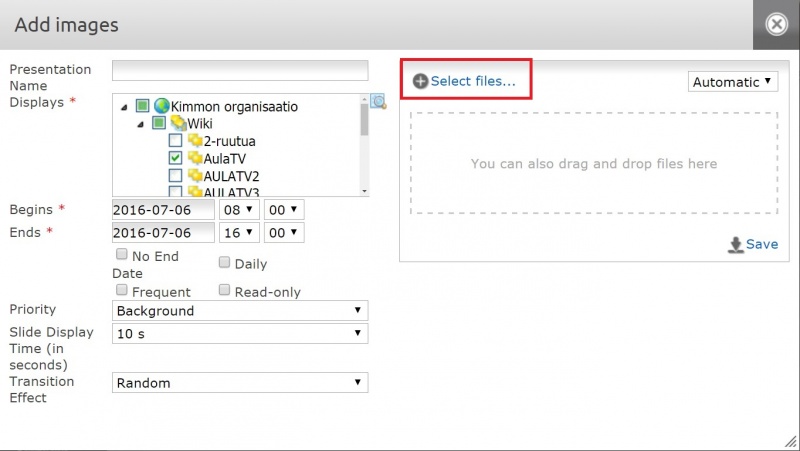
Pictures can be searched from the computer’s hard drive or dragged to the space reserved for pictures.
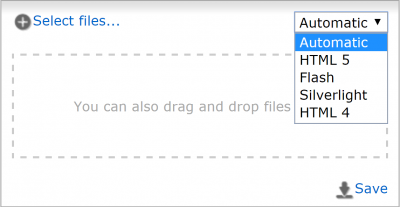
If you have problems loading a picture, try a different loading type.
After adding pictures the presentation can still be modified if needed.
You can return to modifying the presentation also after saving the presentation.
In the modifying state the user can observe and modify the presentation’s settings (such as timing, order of pictures, bring more pictures to the presentation etc.)
Remember to save your changes!
(Materials are transferred to the display depending on connection speed and size and amount of pictures. Usually this takes a few minutes.)
Videos
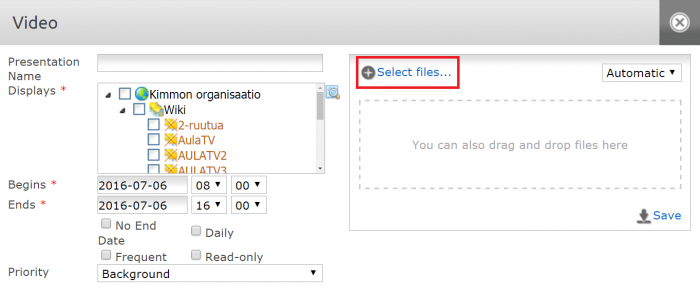
When creating a video presentation a video or videos are added to the presentation.
The user doesn’t have to do any special settings in addition to the basic settings when creating video presentations. For instance, you cannot add text to a video presentation. The presentation includes only video material.
The video can be searched from the computer’s hard drive or it can be dragged to the space reserved for videos.
The audio of the video can be heard by using a HDMI or AUX cable.
Almost all kinds of video formats can be added to the HD Cube and PiCube media players.
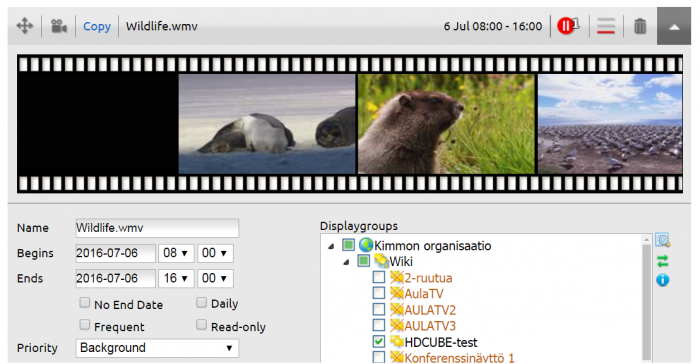
Finally, please check the presentation’s settings before saving.
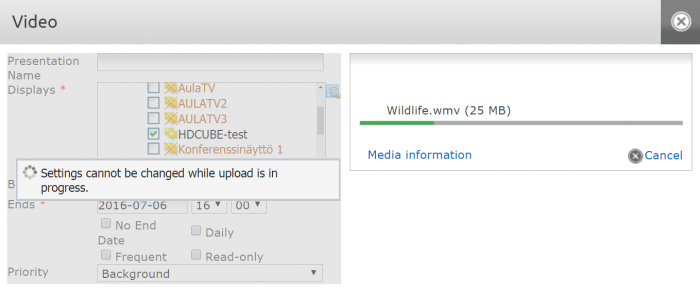
After saving a timeline depicting the loading process will pop up.
NOTE! If the user closes the window before the uploads are ready, the video uploads will be aborted. In this case the presentation cannot be created.
If the upload takes a long time, the user can move to other applications or web sites while the FirstView Manager uploads in the background.
Price list presentation
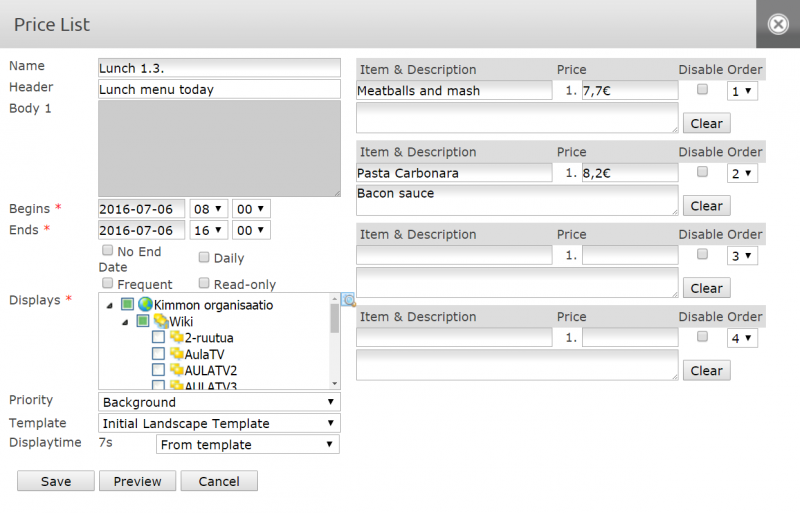
In a price list presentation the user can create different price lists and lunch lists to a pre-made template. The template defines the font, amount of elements and their locations. This means that only the desired head line, body text and products and their descriptions are added to the price list template.
When adding a price list presentation the basic settings are defined first (name, start and end time, displays and priority). The name of the price list can’t be seen, but the headline will show on the display. The price list template defines the layout and amount of products. The template is chosen from the ”Template” dropdown list. (More templates can be ordered from FirstView Technical support)
The names, prices and descriptions of products can be added to the Product & Description sections when creating lunch lists, for instance. The order of the products on the display can be defined by accessing the dropdown list in the right side of the product. By checking the “remove from use” box the user can temporarily remove a product from the price list (if the product has run out, for example). When the “empty” button is clicked, all information regarding the product will be lost (name, price and description).
The result can be viewed by clicking ”Preview”. If you are satisfied, click Save. After saving, a calendar view will open. There you can modify the presentation and/or make a copy of it. By creating a copy of the presentation you can continue the already-made price list and add new products under the same headline. The presentations will be shown after one another on the screen.
RSS
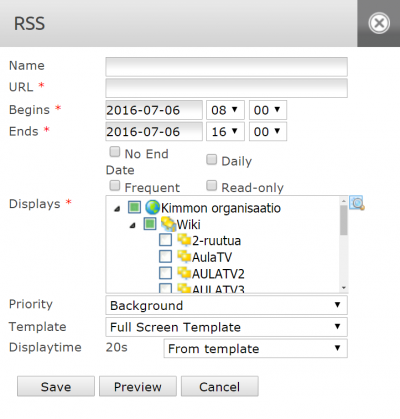
For a RSS presentation the URL address of the RSS feed is added. The layout of the RSS presentation (wallpaper, font, location of contents) will be defined according to the chosen template.
In addition to the URL address, the basic settings are defined (name, start and end time, displays and priority).
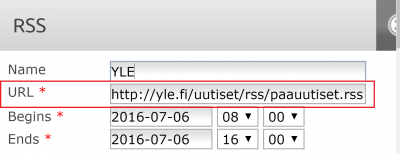
The content of the actual presentation i.e. the RSS feed’s URL is brought to the URL section.
Finally the display time can be modified.
The template has a default display time, but it can be changed by clicking “custom”.
Check the result by clicking Preview and after that click Save.
HTML
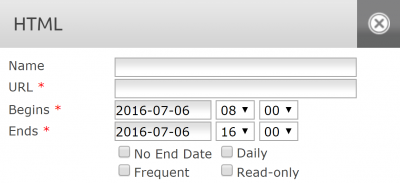
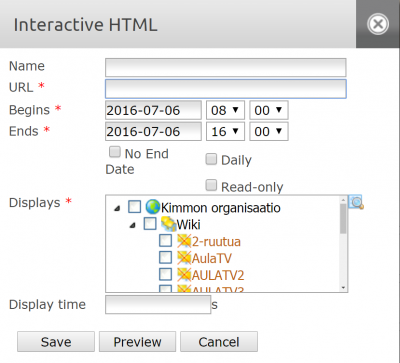
A web site’s URL address is added to a HTML presentation (address in browser). In addition, basic settings are defined (name, timing, displays and priority).
The web site’s address is brought to the URL section. This can be done by typing the address (for example http://www.firstview.fi) or by copy-pasting the address straight from the browser.
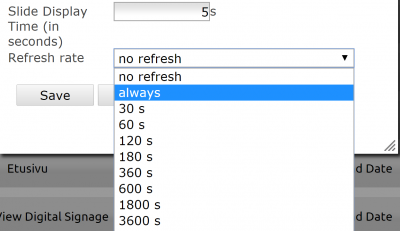
The display time of the picture defines the presentation’s playing time in the media list. Define the picture’s play time and set an update period for the presentation. The update period defines how often the site is automatically updated.
By using a short update period news pages’ contents are updated quickly to the display, for instance. Check the result by clicking “Preview” and then click Save.
Stream
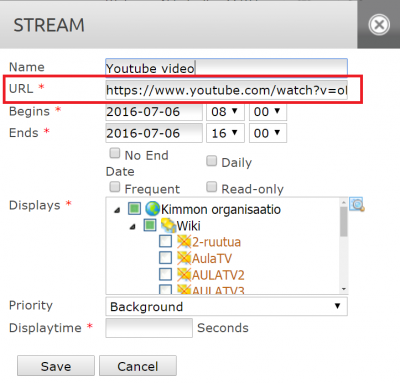
When creating a Stream presentation the streaming link’s URL address is added and the basic settings (name, scheduling, displays and priority) are defined.
You can add a name for the presentation by typing it to the “Name” field. If left empty, the Manager will use the headline of the www-address as the presentation’s name.
After naming the basic settings are defined (start and end time, displays and priority).
A presentation time has to be assigned to a Stream presentation. For example a presentation time of 60 seconds means that the display will show one minute of TV or other streaming material.
When the presentation is ready, it can be sent to the displays by clicking “Save”.
Flash
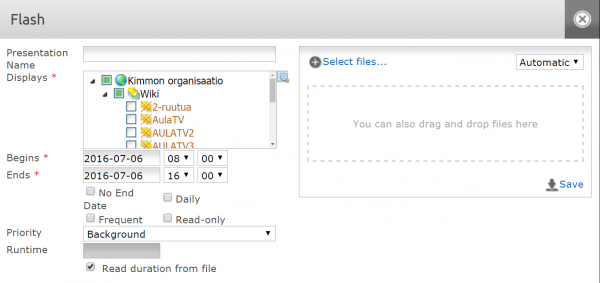
First, basic settings are defined to a Flash presentation (name, start and end time, displays and priority). A Flash file can be added by searching it from the computer’s hard drive or dragging it to the space reserved for the file. The recommended file format is .swf.
The playing time of a Flash presentation is defined automatically based on the playing time of the Flash file.
If a certain playing time is wanted, the “read duration from file” selection should be removed beneath the playing time menu.
After this the desired playing time can be defined in seconds.
Finally, remember to save the presentation!
Interactive material
For an interactive presentation a touch screen and interactive material are needed. The interactive material can be made with Flash or HTML.
If the material is a Flash file, it is brought to presentation just like in other Flash presentations.
If the interactive material is HTML, the URL address of the interactive material’s starting page is added to the presentation.
In addition to the basic settings (name, start and end time, displays and priority) a display time is defined. When adding HTML material the user has to define the display time as an additional setting. When adding Flash material the display time of the presentation is defined automatically based on the file, or the user can define it himself.
If the display time is set to for instance 120 seconds, it means that if the user doesn’t use the content, the material will be switched in 120 seconds. The display time will reset every time the user is in touch with the display.
Animation
Animations are vibrant presentations that can include moving texts and pictures. As a starting point for an animation there is a pre-made animation template that defines the layout of the animation. The template also defines what kind of content can be added and modified when adding a presentation. You can learn about creating an animation template form this link: Animation templates.
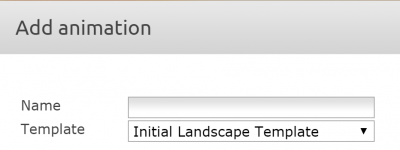
When adding an animation, select a template first from the "Template" dropdown list. Then define the basic settings (name, start and end time, displays and priorities).
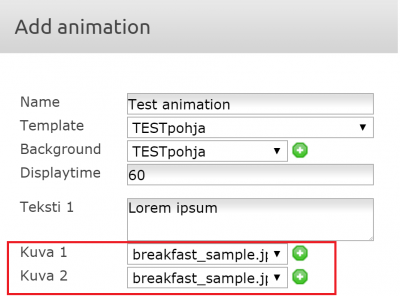
After this additional settings are defined, such as playing time and possibly the presentation’s background, headline, pictures and texts. Possible pictures can be added to the animation by clicking the green plus sign. The amount of pictures and text elements depends on the template’s definitions.
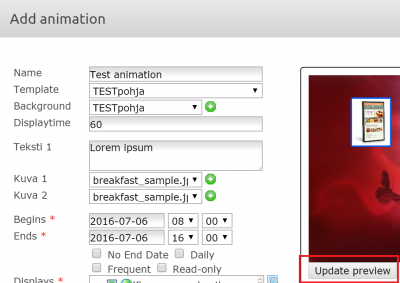
By clicking ”update preview” the information inserted to the presentation will be shown.
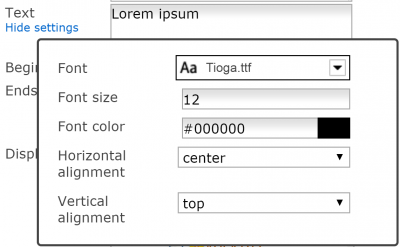
Depending on the settings of the used template the additional settings of the text and pictures can be changed. For example the color, font or size of the text can be modified by clicking the “advanced settings” button under the text field.
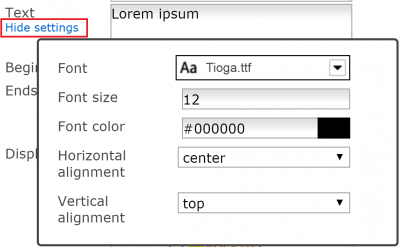
You can close the menu by clicking ”hide settings”.
Finally you can check the result by clicking ”Update preview”. You can save the presentation by clicking “Save”.
Social media
In a social media presentation content from a social media is added to a pre-made template. Material can be added from Twitter, Facebook or Instagram.
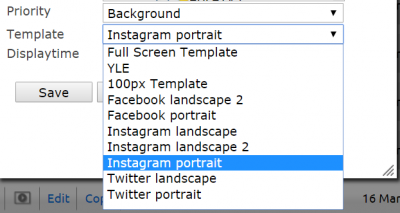
When adding a social media presentation the the desired social media service is chosen first: Twitter, Facebook or Instagram. Every social media has its own characteristics. In terms of adding a presentation it is important to choose the appropriate template depending on the social media service. . If the presentation is meant for a horizontal display, the “landscape” option needs to be chosen (for example Twitter landscape). If the presentation is meant for a vertical display, the “portrait” option needs to be chosen (for example Twitter portrait). The template is chosen from the “Template” dropdown list.
The basic settings are also defined for a social media presentations (name, start and end time, displays and priority). After this a playing time is chosen. The template has a default playing time, but it can be modified by clicking “custom”.
NOTE!
The actual social media content is searched as in the social media service itself. In the "account" section, the URL address is NOT added - the correct "wall" / account is searched with keywords/tags.
TWITTER
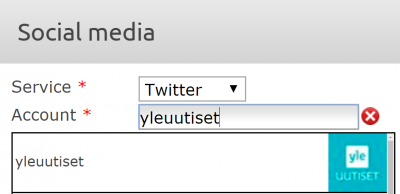
When using Twitter, a Twitter account is typed to the Account field (for example Yleuutiset). The Manager will search for corresponding Twitter accounts.
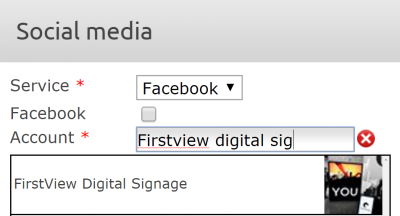
FACEBOOK When it comes to Facebook content it has to be noted that when adding an account you can only search for Facebook accounts, not internet addresses / URLs. Only public Facebook accounts can be searched.
If you want to add FirstView Digital Signage’s Facebook account to the display, you have to type “FirstView Digital Signage” to the account field, not the URL shown in the browser.
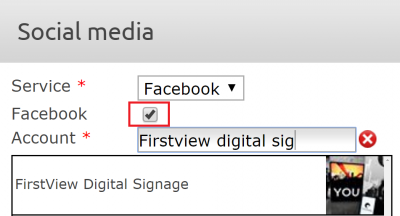
You can choose the service to show only your own posts on Facebook. To do this, tick the box next to "Facebook".
For example, other users’ posts on FirstView’s wall won’t be shown on the display – just FirstView’s own posts can be seen.
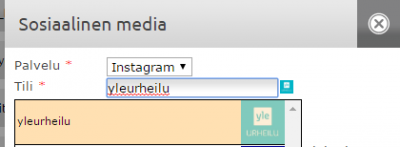
When adding Instagram content to the presentation, be sure to add the Instagram account’s name to the Account field, not the internet address / URL.

